Building Knowledge Safely: A Learning Journey through DIY Rigging Projects
Building Knowledge Safely: A Learning Journey through DIY Rigging Projects
Rigging, once the exclusive domain of industrial settings and construction sites, has now found its way into the realm of DIY enthusiasts. Imagine the satisfaction of constructing your own lifting devices or crafting creative rigging solutions from scratch. In this blog post, we embark on a journey into the world of DIY rigging projects, providing safe step-by-step guides for smaller-scale endeavors that cater to the hands-on spirit of enthusiasts seeking to explore the art and science of rigging in their own workshops.
I. DIY Rigging: From Concept to Creation
- Understanding the Basics:
- Concept: Before delving into specific projects, it’s essential to grasp the fundamentals of rigging, including load distribution, safety factors, and the use of basic tools.
- Guide: Explore online resources, tutorials, and introductory books on rigging to build a foundational understanding.
Interesting Fact #1: The term “rigging” encompasses a wide range of activities, from simple knot tying to complex crane operations, making it a versatile skill set to explore.
II. Project 1: DIY Rope and Pulley System
Concept: Creating a simple rope and pulley system is an excellent entry point into the world of DIY rigging. This project is versatile and can be adapted for various purposes, from hoisting lightweight objects to fitness.
- Materials:
- Rope (choose a sturdy material like nylon or polypropylene)
- Pulley (readily available at herculesslr.com)
- Carabiners or hooks
- Anchor point (such as a tree branch or a sturdy frame)
Step-by-Step Guide:
a. Select a suitable anchor point and secure it to ensure stability.
b. Attach the pulley to the anchor point using a carabiner or a suitable fastening mechanism.
c. Thread the rope through the pulley, creating a simple one-pulley system.
d. Secure one end of the rope to the load you intend to lift.
e. Pull the other end of the rope to raise the load using the pulley system.
Technical Tip: Ensure that the rope is properly threaded through the pulley to maximize the mechanical advantage of the system.
III. Project 2: Homemade A-Frame Crane
Concept: For those seeking a more substantial DIY rigging project, building a homemade A-frame crane provides an opportunity to explore structural design, load distribution, and the use of basic materials.
- Materials:
- Wooden beams or boards
- Plywood sheets
- Screws or nails
- Lifting strap or chain
- Pulley system
Step-by-Step Guide:
a. Construct two triangular A-frame structures using wooden beams.
b. Connect the A-frame structures at the top using a horizontal beam to form the crane’s frame.
c. Attach plywood sheets to the A-frame structures to create stability.
d. Install a pulley system at the top of the frame, ensuring it can freely rotate.
e. Secure a lifting strap or chain to the load you intend to lift.
f. Thread the lifting strap or chain through the pulley system.
g. Use the A-frame crane to lift and lower loads with the assistance of the pulley system.
Technical Tip: Consider the load capacity of your homemade A-frame crane and ensure that all connections are securely fastened.
IV. Project 3: DIY Knot Board for Knot Practice
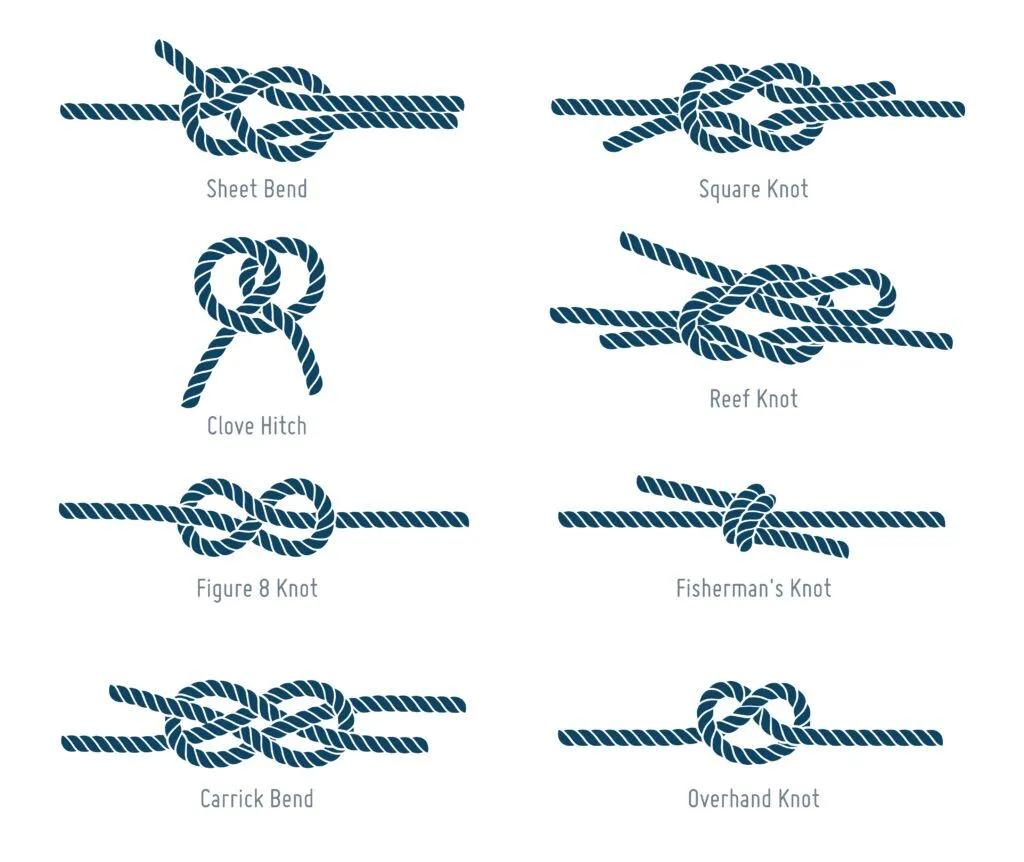
Concept: Understanding and mastering different knots are fundamental skills in rigging. Creating a DIY knot board provides a practical and visual way to practice and learn various knots.
- Materials:
- Wooden board or panel
- Assorted ropes in different thicknesses and colors
- Screws or nails
- Drill
Step-by-Step Guide:
a. Select a wooden board or panel as the base for your knot board.
b. Securely attach the board to a wall using screws or nails.
c. Gather an assortment of ropes in different thicknesses and colors.
d. Cut the ropes into varying lengths to practice different knot techniques.
e. Drill small holes into the board to thread and secure the ropes, creating a visual representation of different knots.
f. Label each knot and provide information on its specific applications.
Technical Tip: Include common rigging knots such as the bowline, clove hitch, and square knot on your DIY knot board for comprehensive knot practice.
V. Safety First: DIY Rigging Best Practices
- Start Small:
- Guide: Begin with smaller projects and gradually progress to more complex ones as your skills and understanding of rigging principles grow.
- Guide: Educate Yourself: Invest time in studying rigging concepts, safety guidelines, and best practices through reputable sources and educational materials.
- Guide: Invest time in studying rigging concepts, safety guidelines, and best practices through reputable sources and educational materials.
Interesting Fact #2: Rigging safety involves not only the proper use of equipment but also an understanding of load calculations and environmental factors.
VI. Final Thoughts: DIY Rigging as a Learning Journey
Engaging in DIY rigging projects offers enthusiasts a truly enriching experience that extends far beyond the mere creation of functional tools. It becomes a captivating journey of exploration and continuous learning, where each project serves as a valuable stepping stone toward unraveling the intricacies of load distribution physics and refining the delicate art of tying essential knots.
Through hands-on engagement and experimentation, enthusiasts not only acquire technical proficiency but also cultivate a profound and holistic appreciation for rigging—seeing it not merely as a skill but as a harmonious blend of art and science. So, gather your tools, establish your workspace, and immerse yourself in the empowering odyssey of DIY rigging, seamlessly integrating these principles into your creative domain.
——————————————————————————————————————————————
The Hercules Group of Companies encompasses a wide portfolio of products and services across 7 diverse companies.


